


Easy DIY Wooden Ladder Towel Rack
This DIY towel rack blog was written by a paid contributor. All photos were taken by Kaysea Hunter.
My husband is in the military, and a few years ago, we moved into a military community. While I’ve found many things to love about living in military housing, our primary bathroom wasn’t one of them. Storage was less than ideal, and there was only space to hang one towel! That was when I knew my first order of business: find a way to trade that lonely towel bar for something that could hold multiple towels and wash rags.
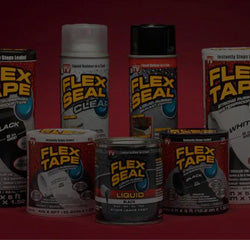
I began thinking up bathroom towel rack ideas and decided to make a DIY wooden ladder towel rack. Since towel racks are frequently exposed to moisture, I wanted mine to be waterproof. Flex Seal products were the perfect choice to help protect my wooden ladder towel rack from water damage and should keep it looking great for years to come.
Keep reading for a step-by-step guide on making a waterproof DIY ladder towel rack for your bathroom using Flex Seal Products.


Get supplies for this project now at Lowe's.
Materials
● 1 Flex Seal spray can, almond
● 1 Flex Seal Liquid quart, black
● 1 Flex Glue 9oz cartridge, clear
● Caulking gun
● Foam applicator brush
● 2, 6’ wood 2x2s
● 5, 1” Dowels
● Circular Saw
● Drill
● 1” Spade Bit
● Speed square
● Sandpaper
Steps
Note: Use caution when working with power tools and always follow manufacturer’s instructions. Before using Flex Seal products, read all directions and take proper safety precautions, such as being in a well-ventilated area and wearing protective gear while applying.
1.Cut Wood

Cut the bottoms of each 2x2 at a 5-degree angle using a circular saw. Doing this will allow the ladder to sit evenly on the floor while leaning against the wall. If you don’t have an electric saw, you can always use a handheld one!
Once your wood is cut, lightly sand any rough areas or imperfections.
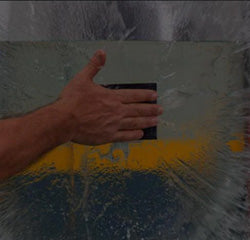
2. Waterproof Ladder Legs With Flex Seal Liquid

Now that your wood is cut, it’s ready to be sealed. Take a foam applicator brush and apply a coat of Flex Seal Liquid to each of the 2x2s, making sure to cover them completely. I love how Flex Seal Liquid added both color and waterproof protection to the wood at the same time!
Flexpert Tip: I found that using the brush to push the Flex Seal Liquid across the wood was more effective than dragging it across. After application, allow 24-48 hours for the product to dry.
3. Waterproof Wooden Dowels With Flex Seal

To achieve contrast between the dowels and ladder legs, I sprayed the dowels with Flex Seal almond. Flex Seal spray comes in 12 different colors, so you can choose whatever color best fits your style!
Hold the can 8-10 inches away from the dowels and use gentle sweeping motions as you spray. Make sure to cover the dowels completely and allow 24-48 hours for Flex Seal to dry.
Flexpert Tip: I made a jig from a scrap 2x4 that was lying around to hold the dowels while I sprayed and placed cardboard around the workspace to protect my table and walls from overspray.
4. Measure and Drill Dowel Holes

Next, you’ll be creating holes to place the dowels into. Measure approximately 11” from the top of your 2x2 and make marks in 11” increments for your rungs to be placed.
Flexpert Tip: I used a speed square to ensure my markings were the same on each side.
Then, use a spade bit to drill holes on these marks, approximately 1⁄4" deep. I marked the depth on my bit using a sharpie to ensure all holes were of equal depth.

5. Secure Dowels With Flex Glue Clear
After clearing out any wood chips or dust, apply Flex Glue clear to the holes for stability and insert the dowels. Glue one dowel at a time and apply pressure for 15-30 seconds before moving onto the next dowel.
Flexpert Tip: Allow 24-48 hours for Flex Glue to fully cure before use.
6. Hang up Your Towels and Enjoy Your DIY Ladder Towel Rack

Once the Flex Glue is dry, set your finished ladder rack against the wall and enjoy your creation! I chose to hang our towels from decorative hooks, but they could also be draped directly over the wooden dowels since the wood is protected by Flex Seal.
I am so pleased with how this DIY ladder towel rack turned out, and now I’m one step closer to the bathroom of my dreams, thanks to Flex Seal!
By Kaysea Hunter
Related Articles


CRAFTS & DIY PROJECTS


- Choosing a selection results in a full page refresh.